Flowers have always been of great interest to artists of all levels. No matter if you are a professional or just starting out, painting botanical art can be as challenging. In this tutorial, we made everything to offer a simple and fun way of painting a fiery red poppy flower!
I, Yana, love poppies. You can paint one in 3 quick brush strokes or take your time with all the veins, shadows in between folds. In both cases, you will get this inspiring summer flower full of light, color, and positive energy. Today, I am going to share it with you.
Art tools you will need today:
Watercolors: I am using a professional-grade watercolor in tubes, Rosa. You can go with a student-quality grade paint. We will use a limited color palette: red, yellow, green, blue (or black).
Paper: I use a cellulose paper Canson Montval. If you can take 100% cotton paper, I always advocate for that!
Brushes: I use a round natural brush (sable) because my flower takes up lots of space on a paper sheet. I would need to release more water to cover large petals. I also use a round synthetic brush for smaller details, where I need to control water and paint better.
And finally, you will need a thin pencil (can be automatic), eraser, tissues, a cup of clean water.
You can download a photo reference here.
LIFETIME ACCESS OFFER
Lifetime access to 47 watercolor classes taught by a professional artist.
✅ Full library access, 47 classes
✅ Beginner to Advanced crash course
✅ All our ads-free YouTube videos
✅ Private Facebook group
✅ Real Teacher Feedback
✅ Optional Coaching Sessions

16 simple steps to paint a red poppy flower with watercolors. Beginner level!
Total Time: 1 hour
Step 01
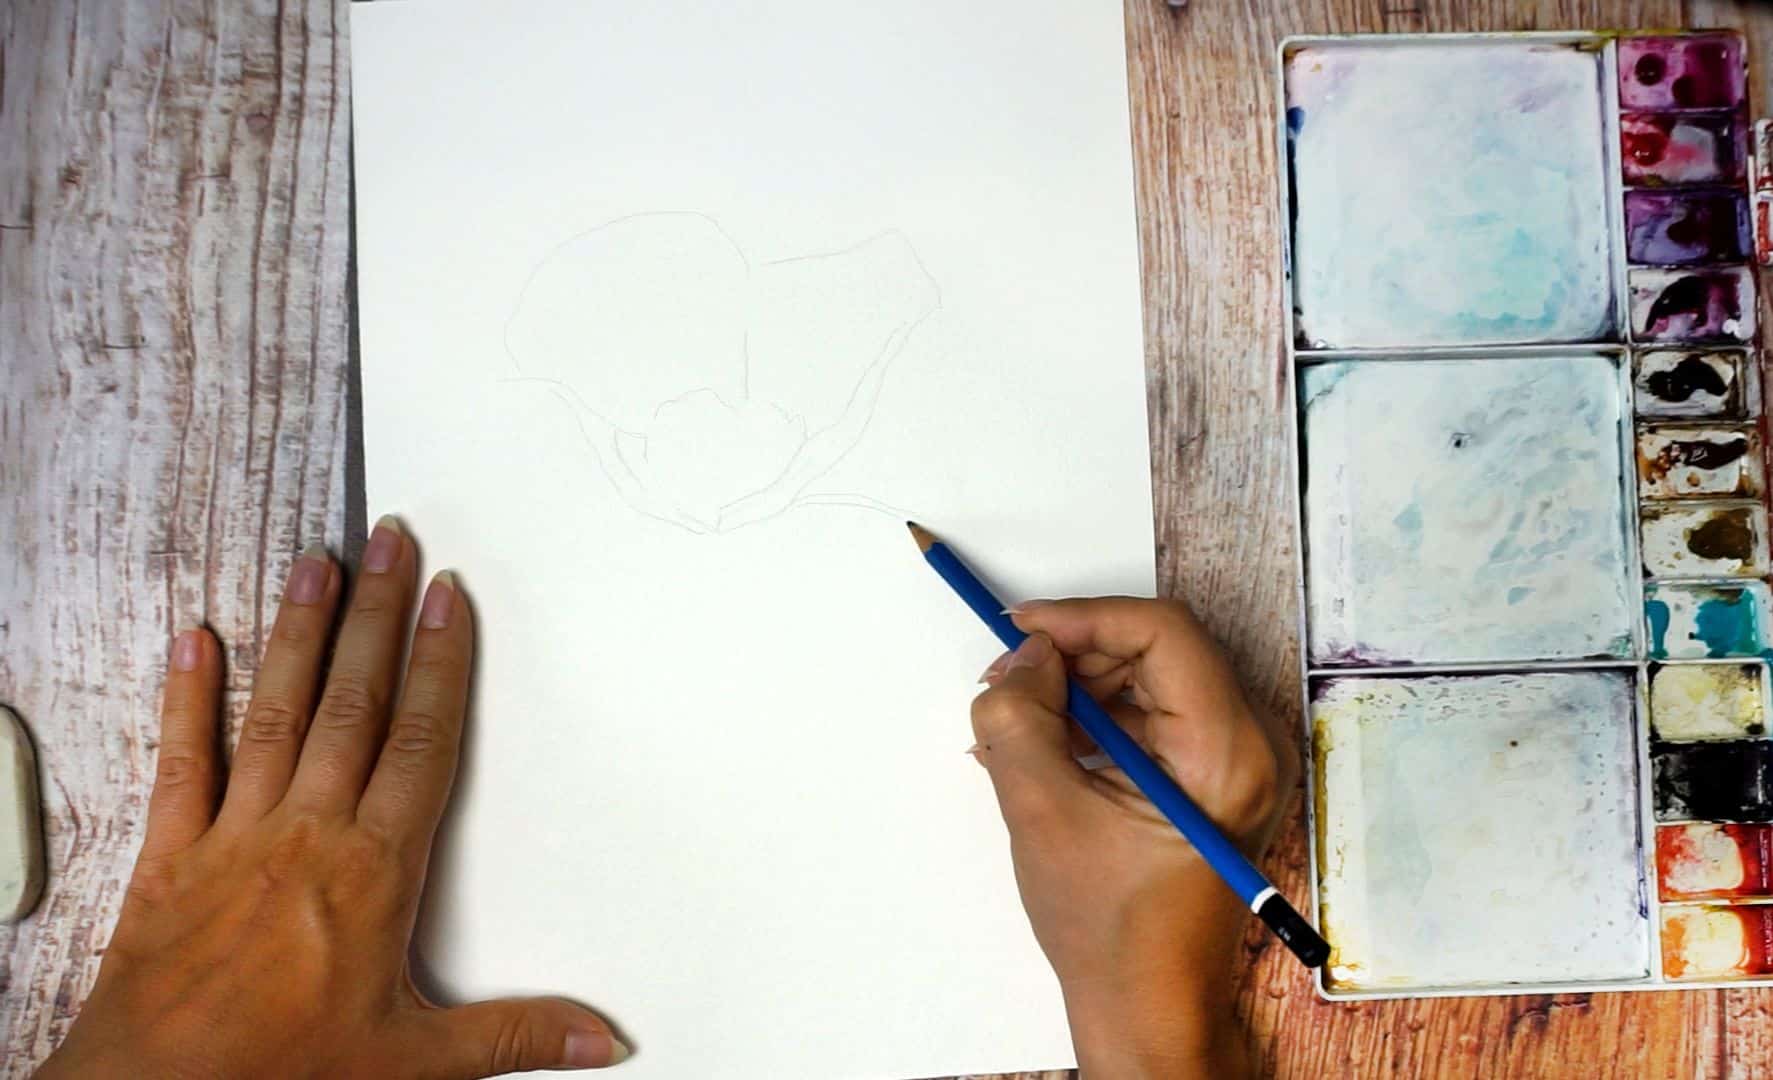
Without a sketch, it is going to be pretty difficult to navigate all the petals. Use the thin pencil (automatic) or a regular hard pencil (any H type). When you draw your flower, make sure you do not press a pencil against the paper sheet too hard.
Hard lines are hard to erase, they will leave marks on paper or will be visible under the watercolor layer.
Here is how a sketch looks like. I made lines darker for you to be able to see them. Your sketch must be twice lighter than this.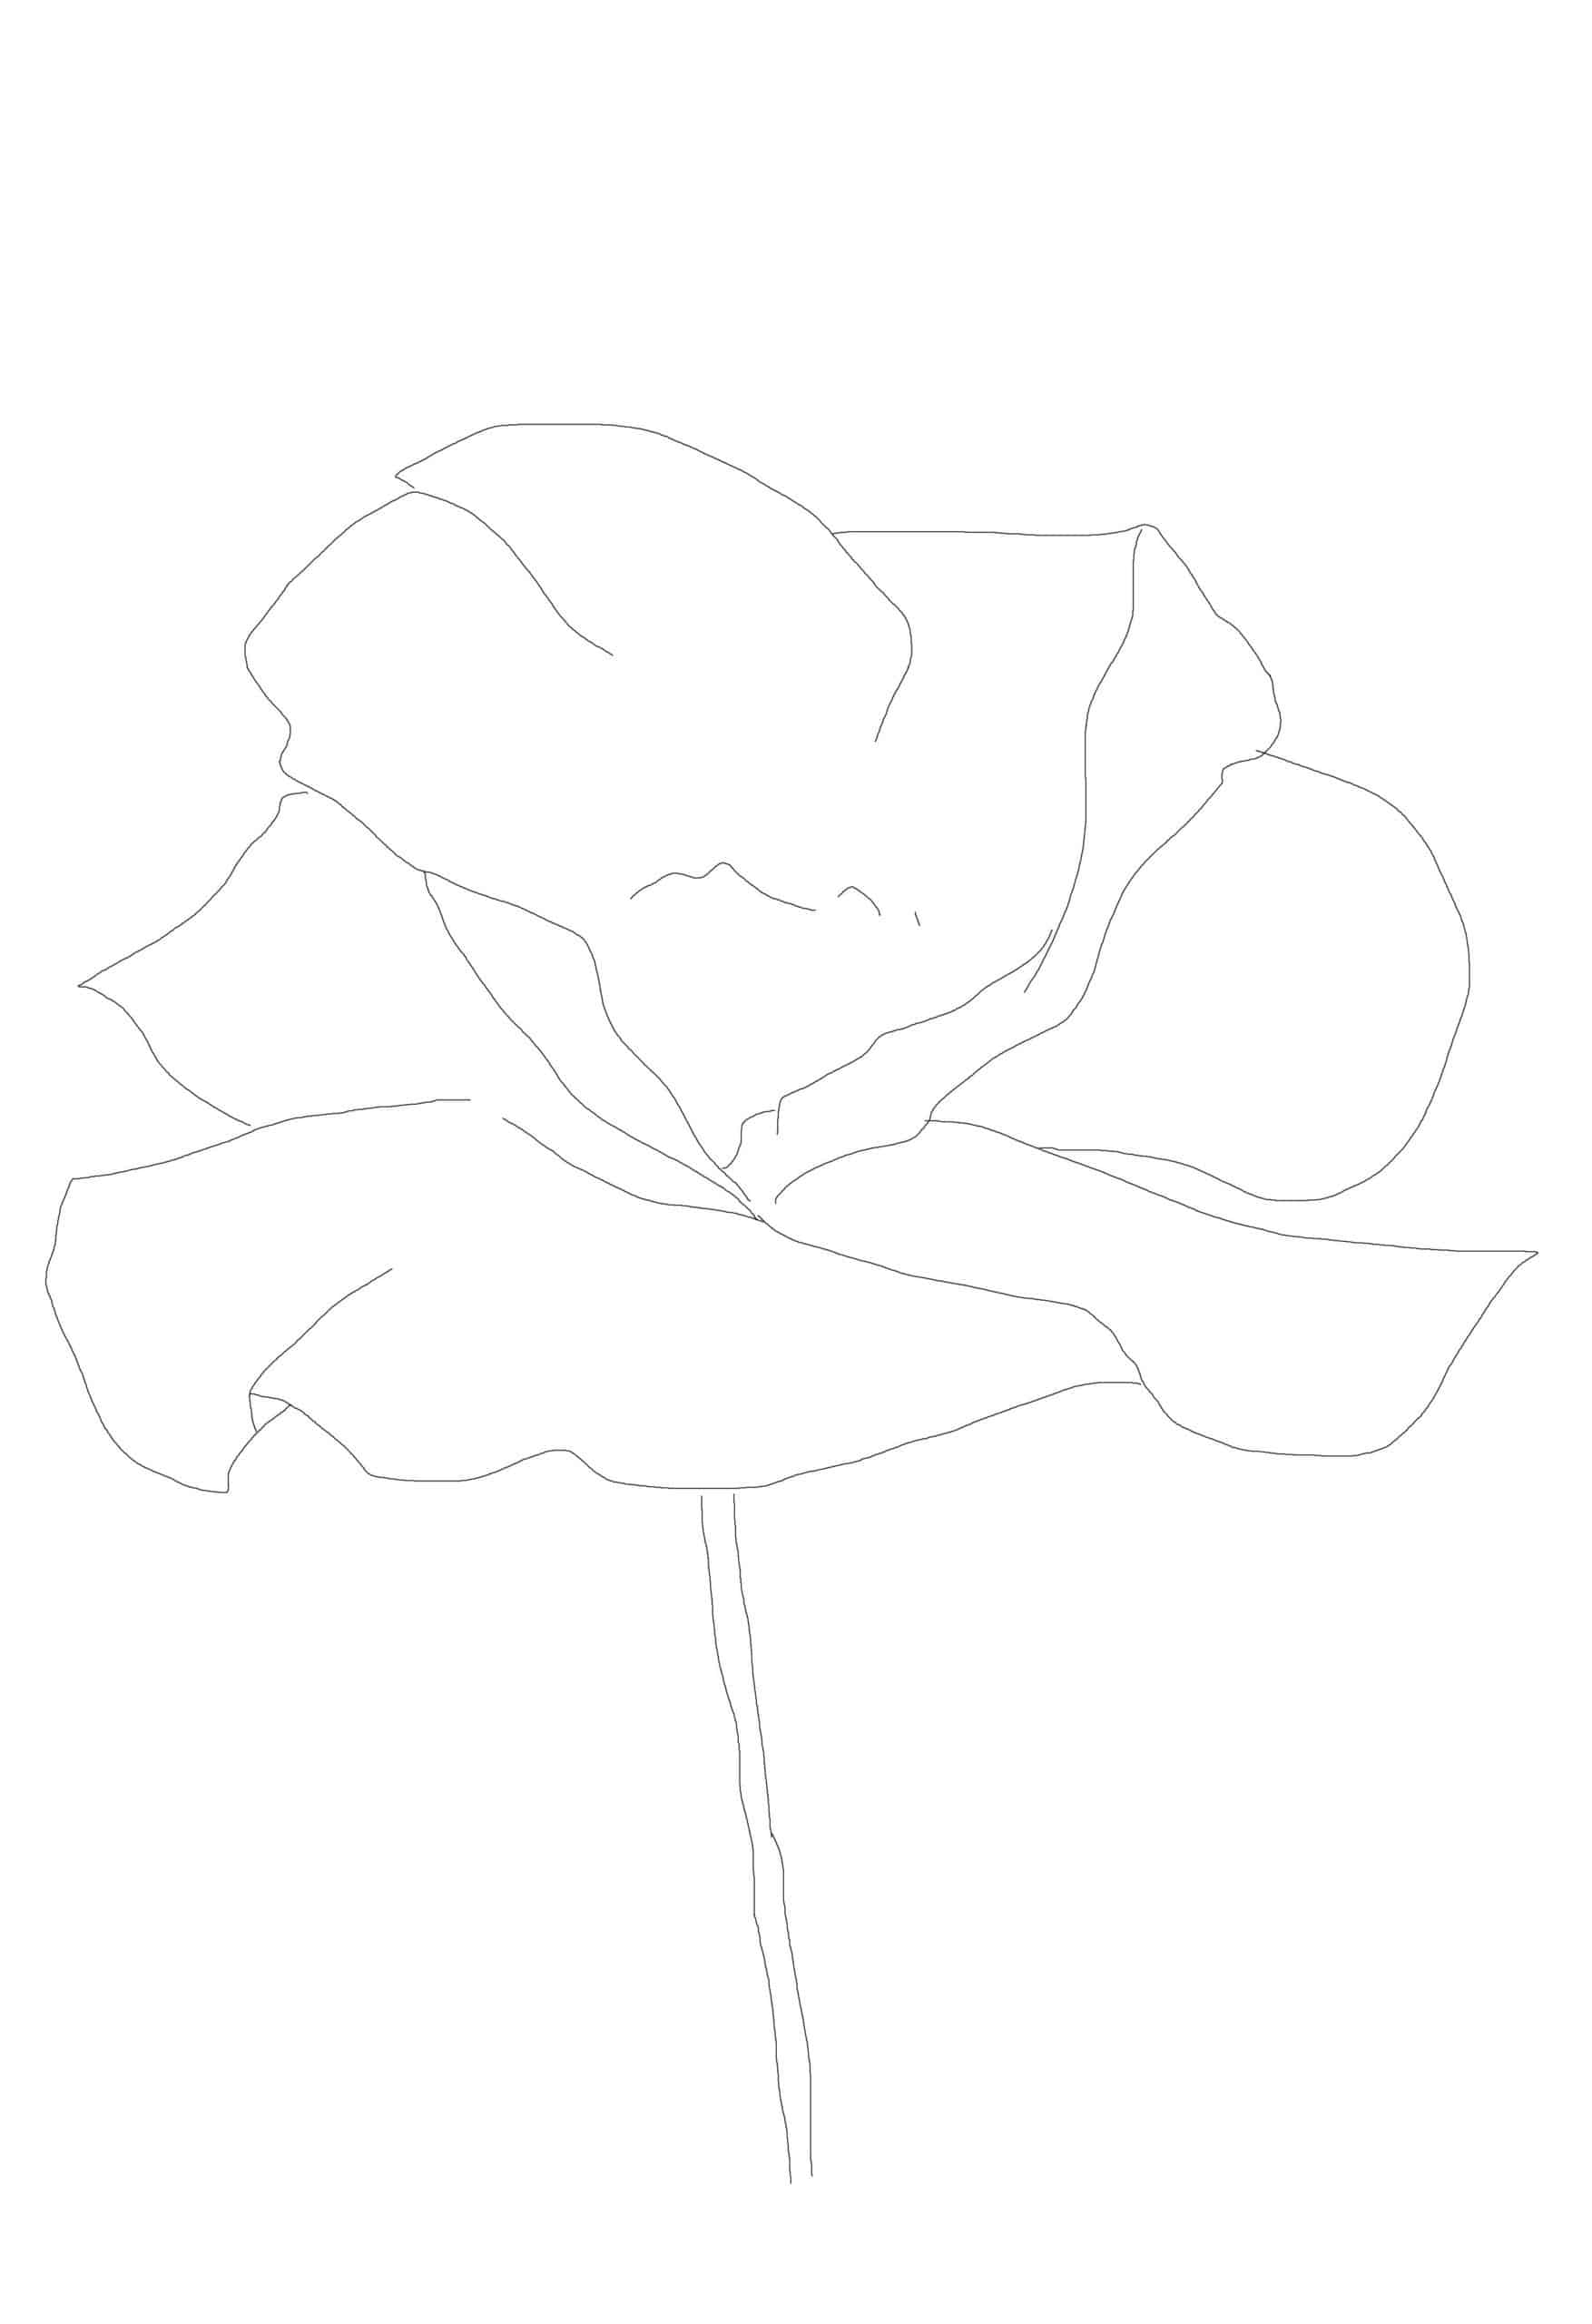
Step 2
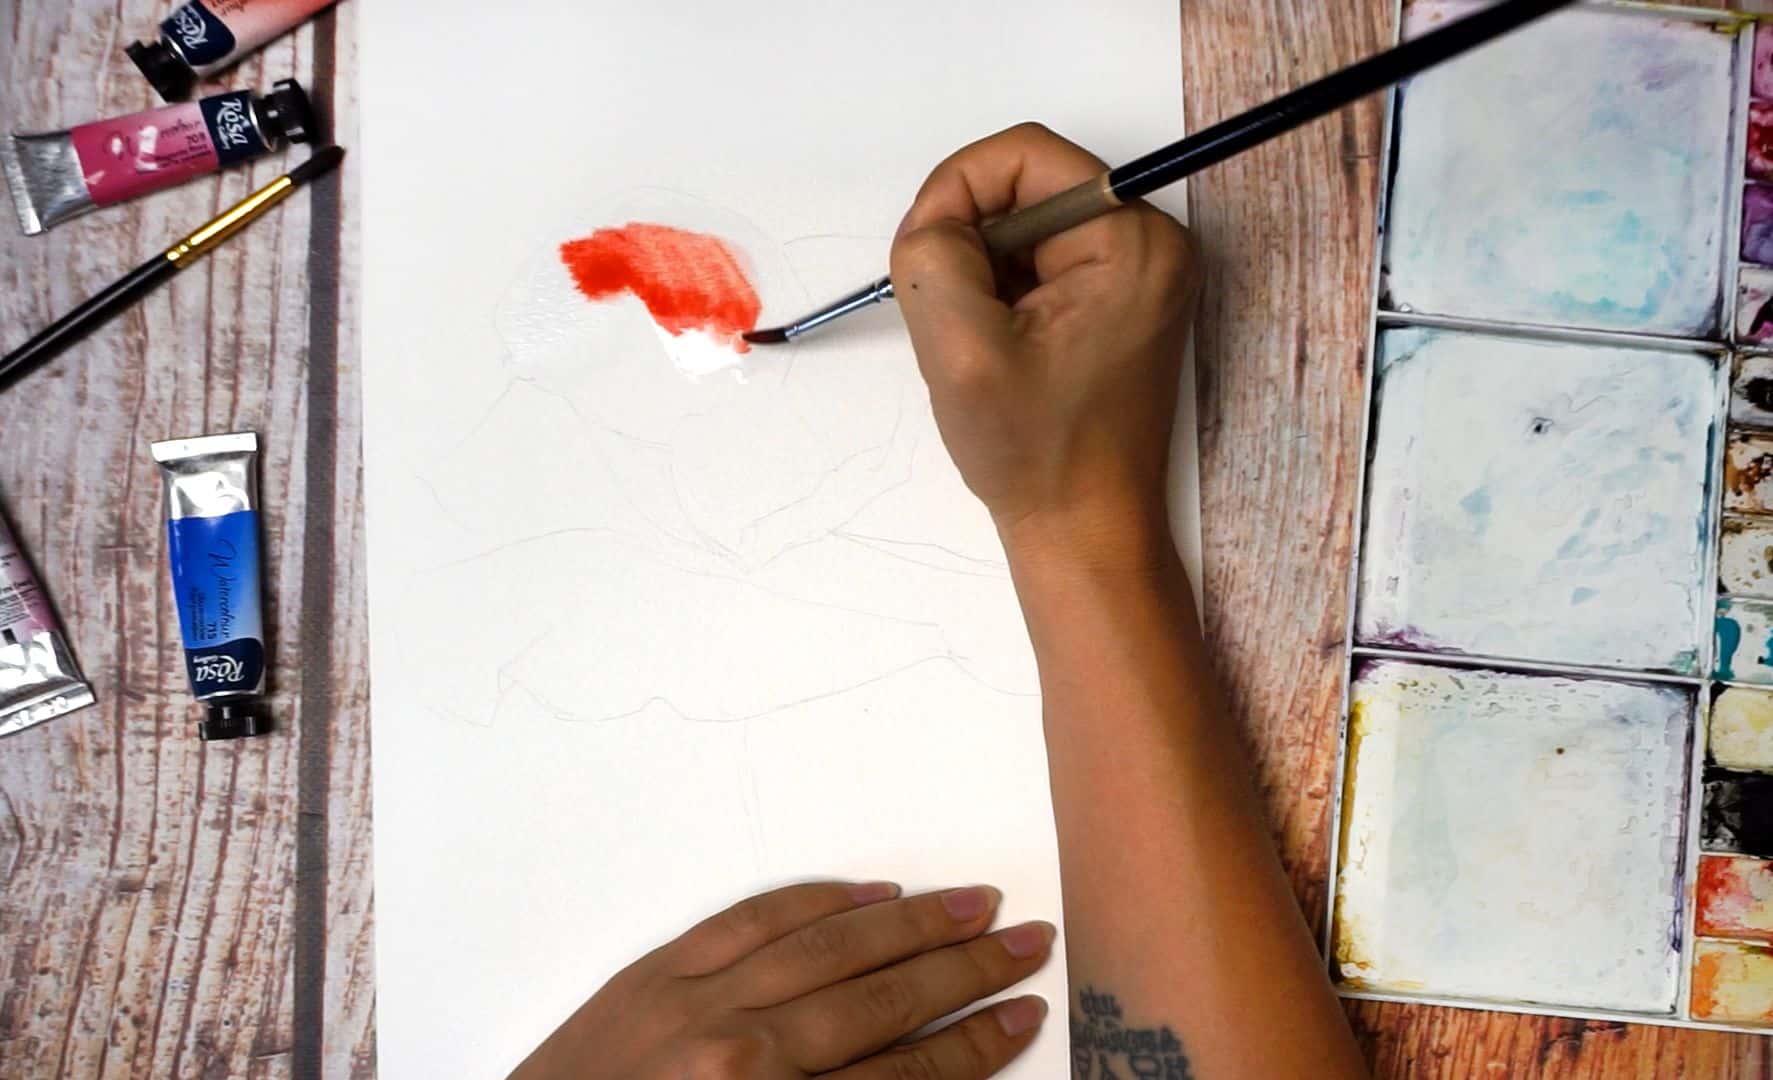
I picked a top left petal to start with. Apply clean water on this petal first, then add a layer of red paint (Cadmium Red/Bright Red, etc). Since I am using a natural brush, it carries lots of water and allows me to spread the paint across the petal evenly. If you use a synthetic brush for this part, make sure to get more water on your brush so that your stroke does not look dry.
Step 3
While your first layer of red paint is wet, add a drop of yellow paint (Cadmium Yellow, Cadmium Orange). Make sure there is no definitive line where those 2 colors connect. Since the first layer was wet you should be able to mix the 2 colors without sharp lines. Keep the petal smooth.
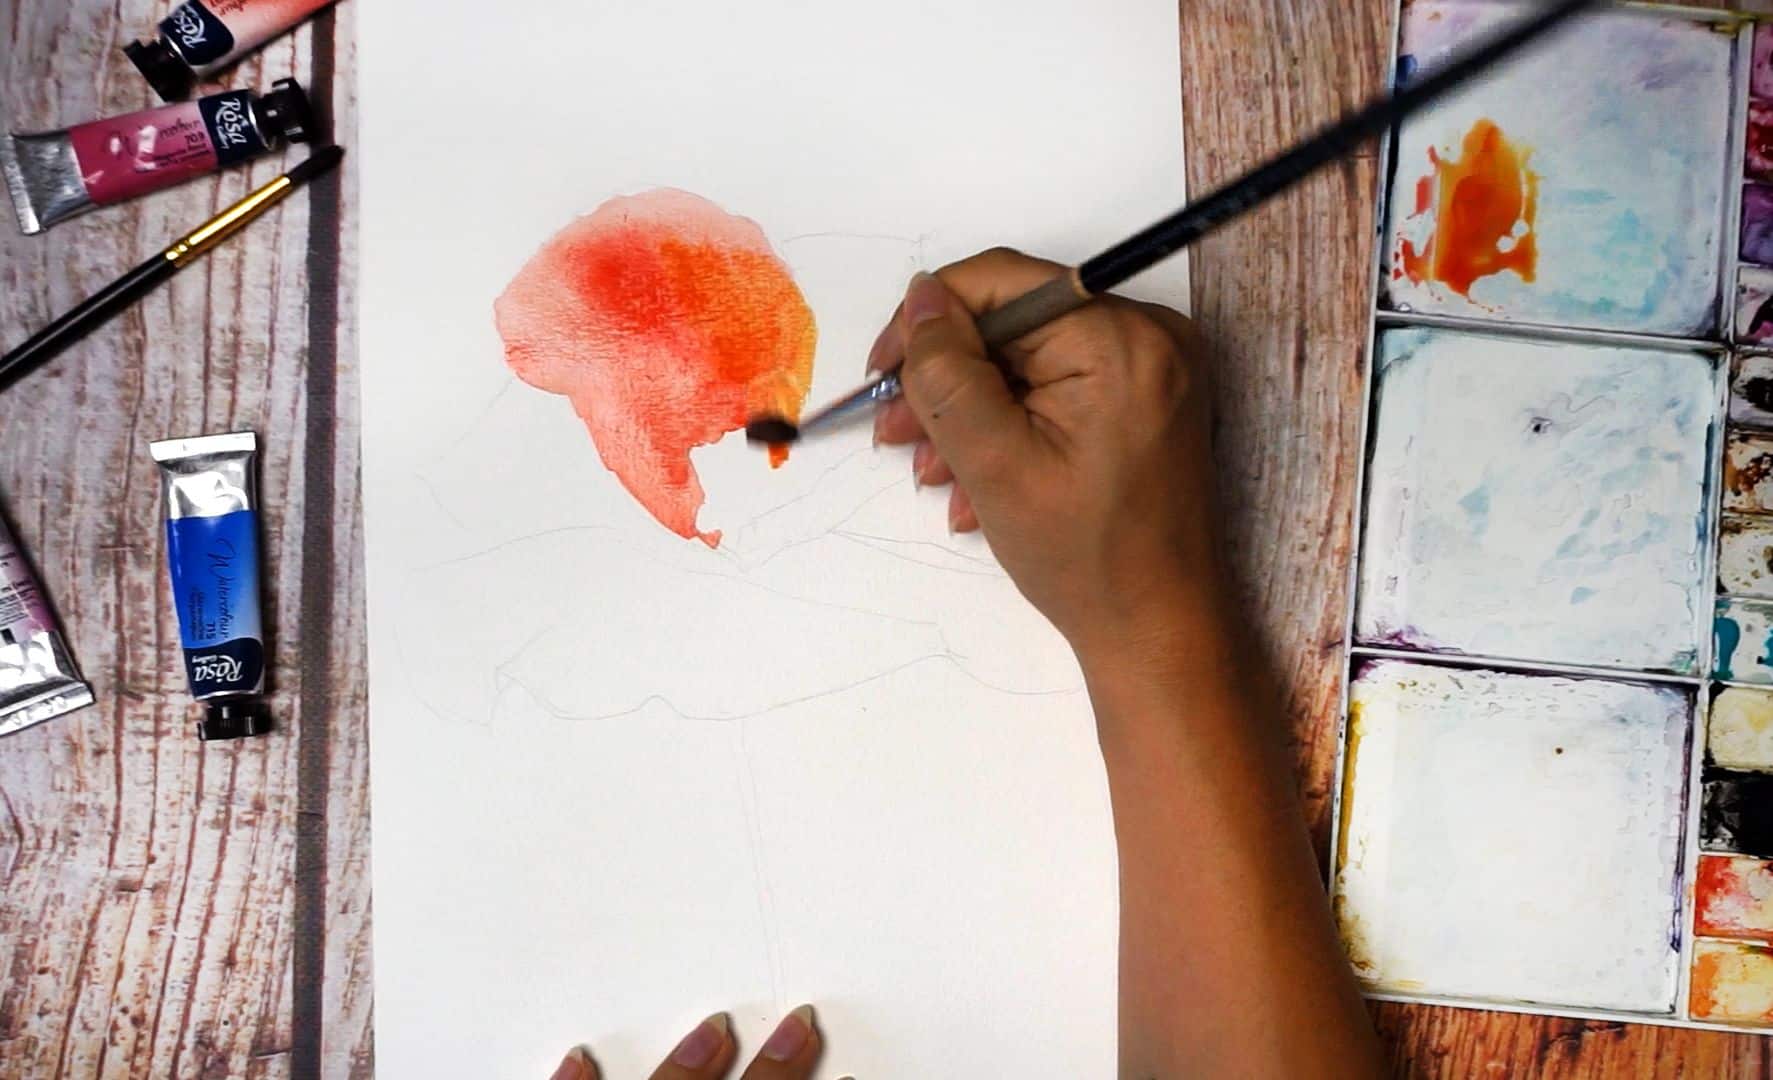
Step 4
Carefully finish the first petal spreading a mix of red and yellow. Let each color shine. Make sure there are no sharp lines inside this petal.
Step 5

Don’t wait too long, start working on the next petal. I chose the one that touches my initial petal on the right side. Having a natural brush allowed to keep humidity on the second petal. Since my first petal is still wet, I managed to connect the second petal without a sharp edge. Both petals look like one wash.
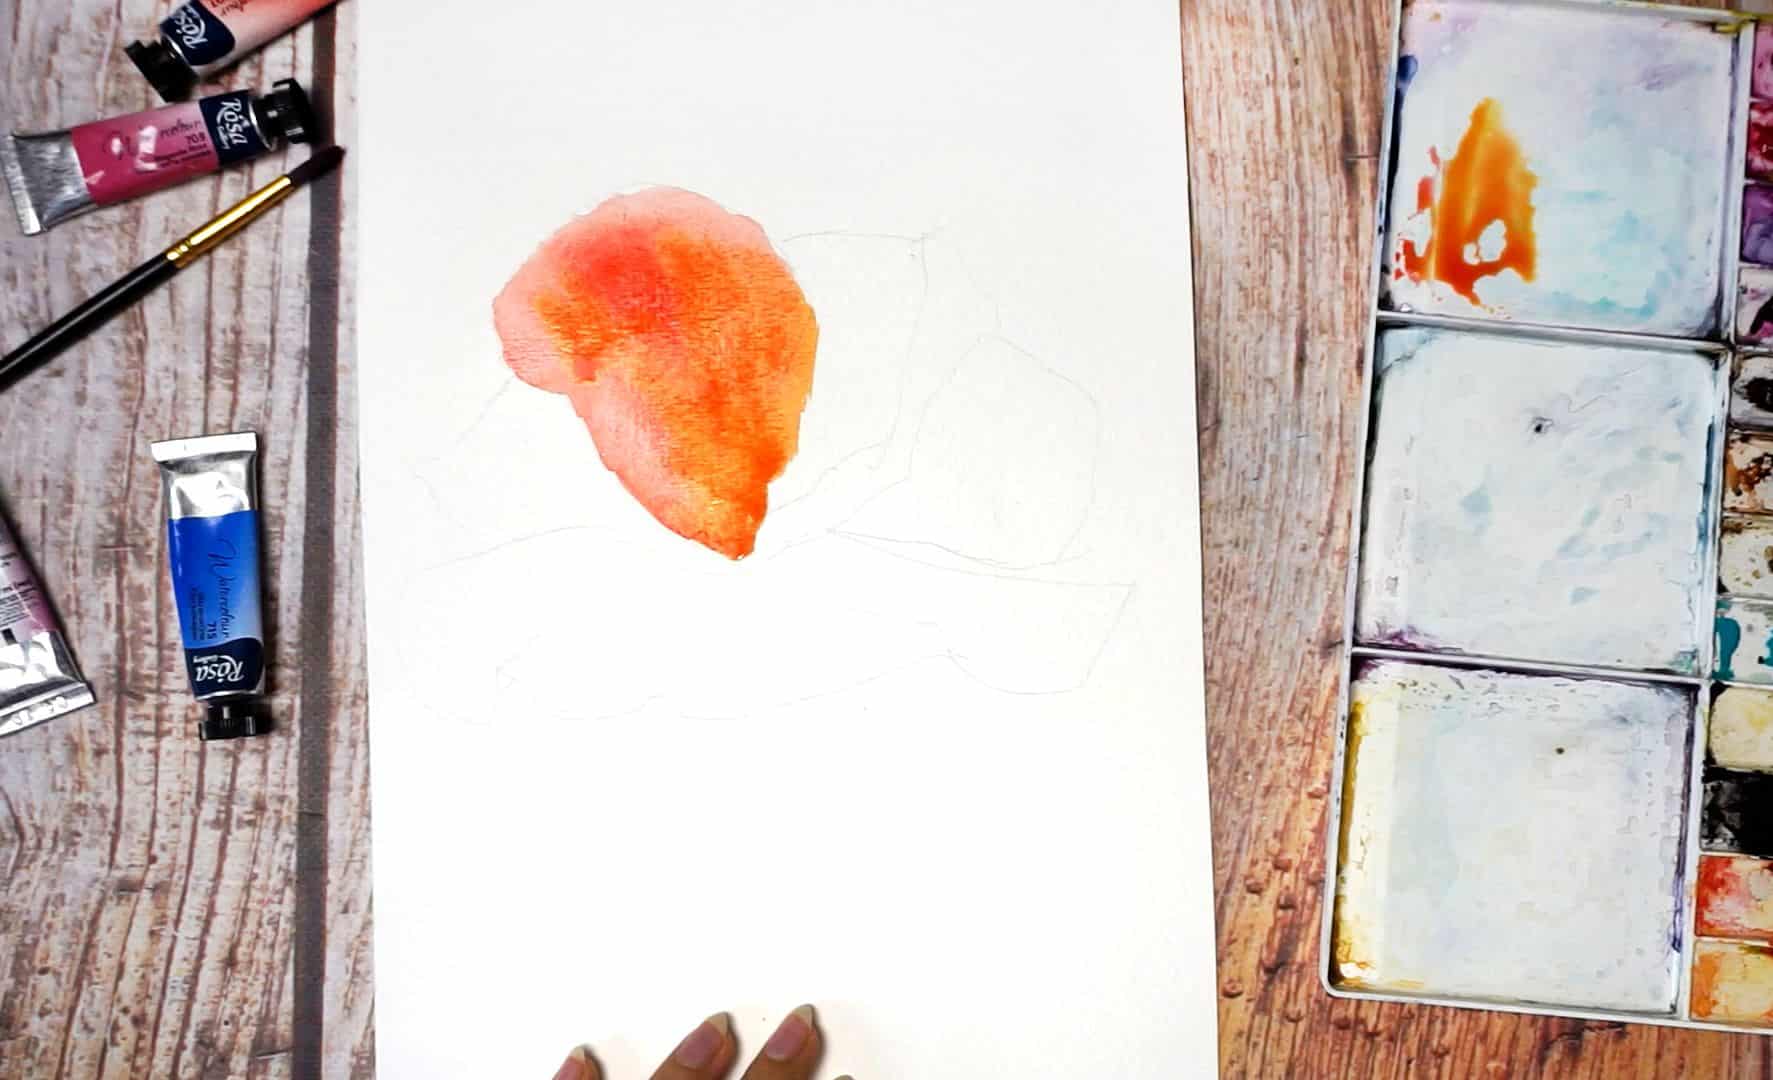
Step 6

Now I am doing the same on the left side. Adding a third petal using the same colors: red and yellow. In some places, there is more red color, in others – more yellow. Play with it!
Step 7
Now I connect a petal #4 on the right. My brush is reasonably wet which allows me to smoothly add this petal to an existing one. Make sure that in all 4 petals the red and yellow colors are balanced. Avoid having loads of, for example, red on one side and bits of yellow on the left.
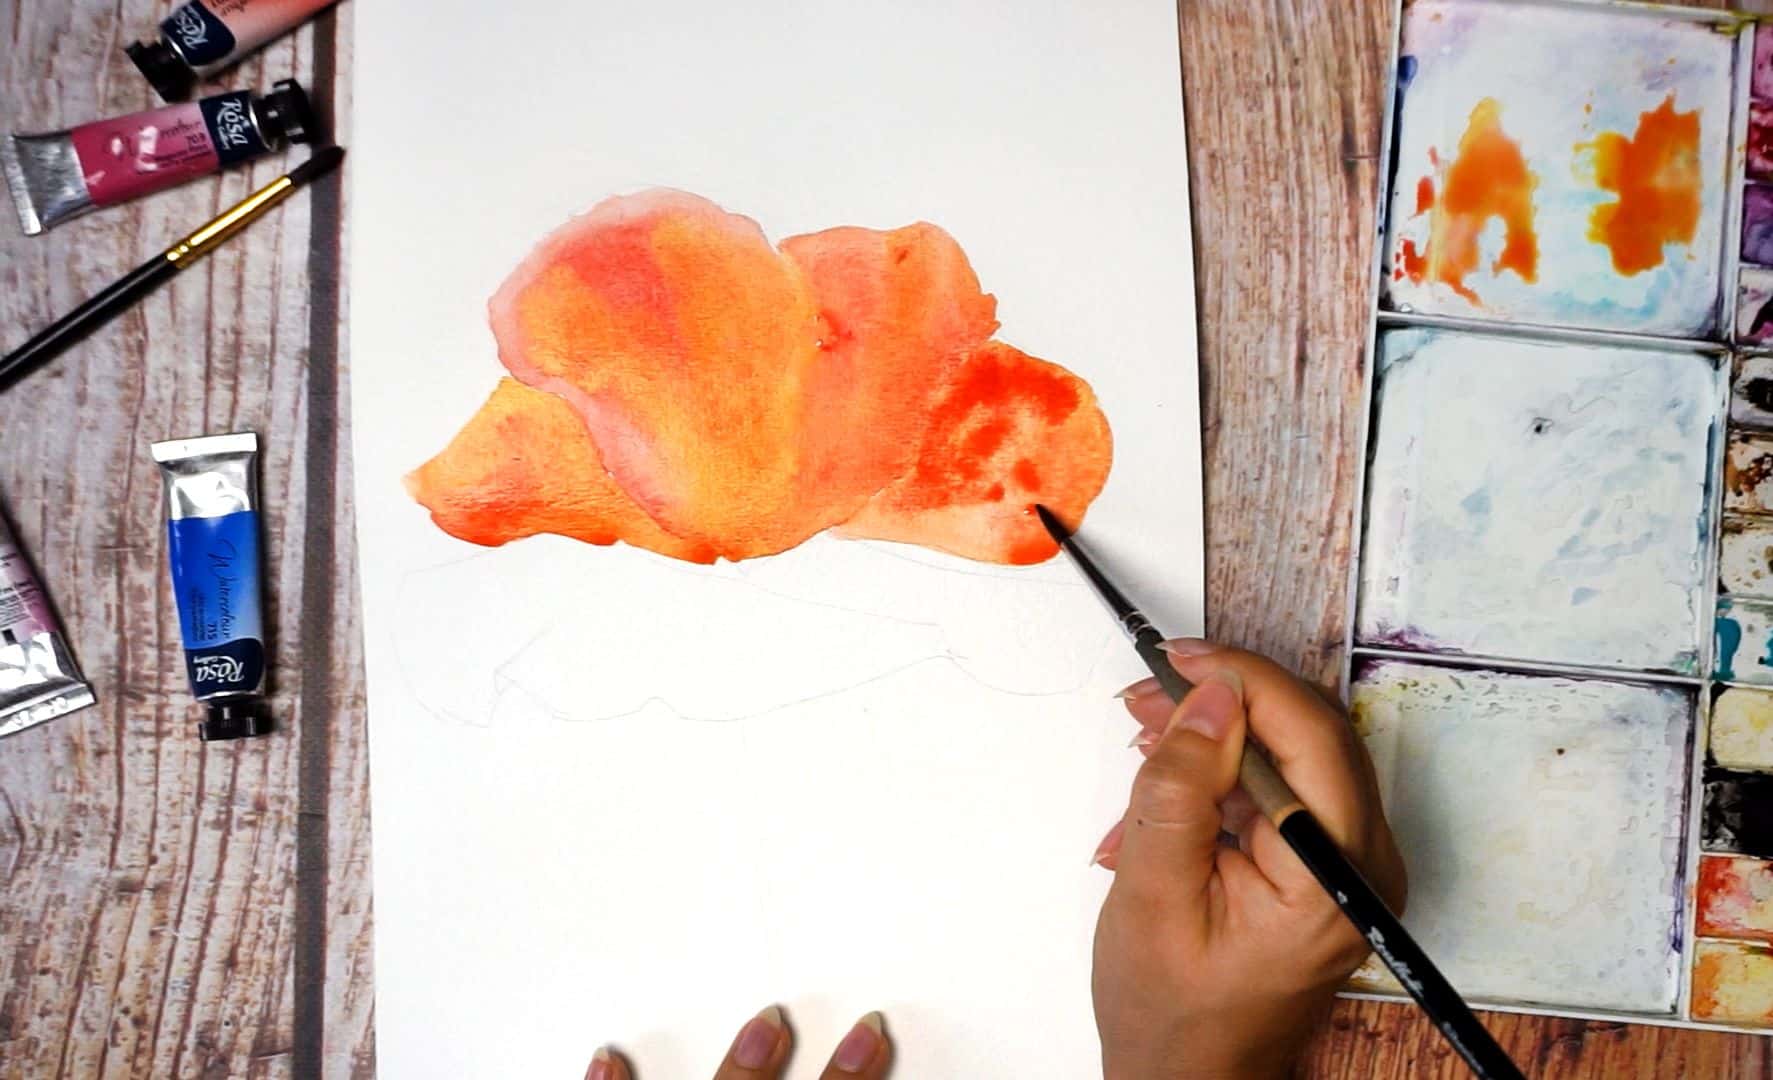
Step 8

Time for the last and largest petal in the bottom. I applied paint right away because my brush already carries enough water for me to ensure smooth layering. However, if you use a synthetic brush, you can use the wet-on-wet technique here: first, lay down some clean water on the petal and then the paint.
Time to leave our flower to dry before we apply new layers and work on shadows.
Step 9

Time to work on shadows. We need to mix a darker tone of red. I use a complementary color – green – to achieve darker red color. Practice on a separate piece of paper first before applying your darker tone to an actual painting. Make sure that the paint you’re laying down is wet. You do not want any sharp or dry strokes on your petals!
Step 10
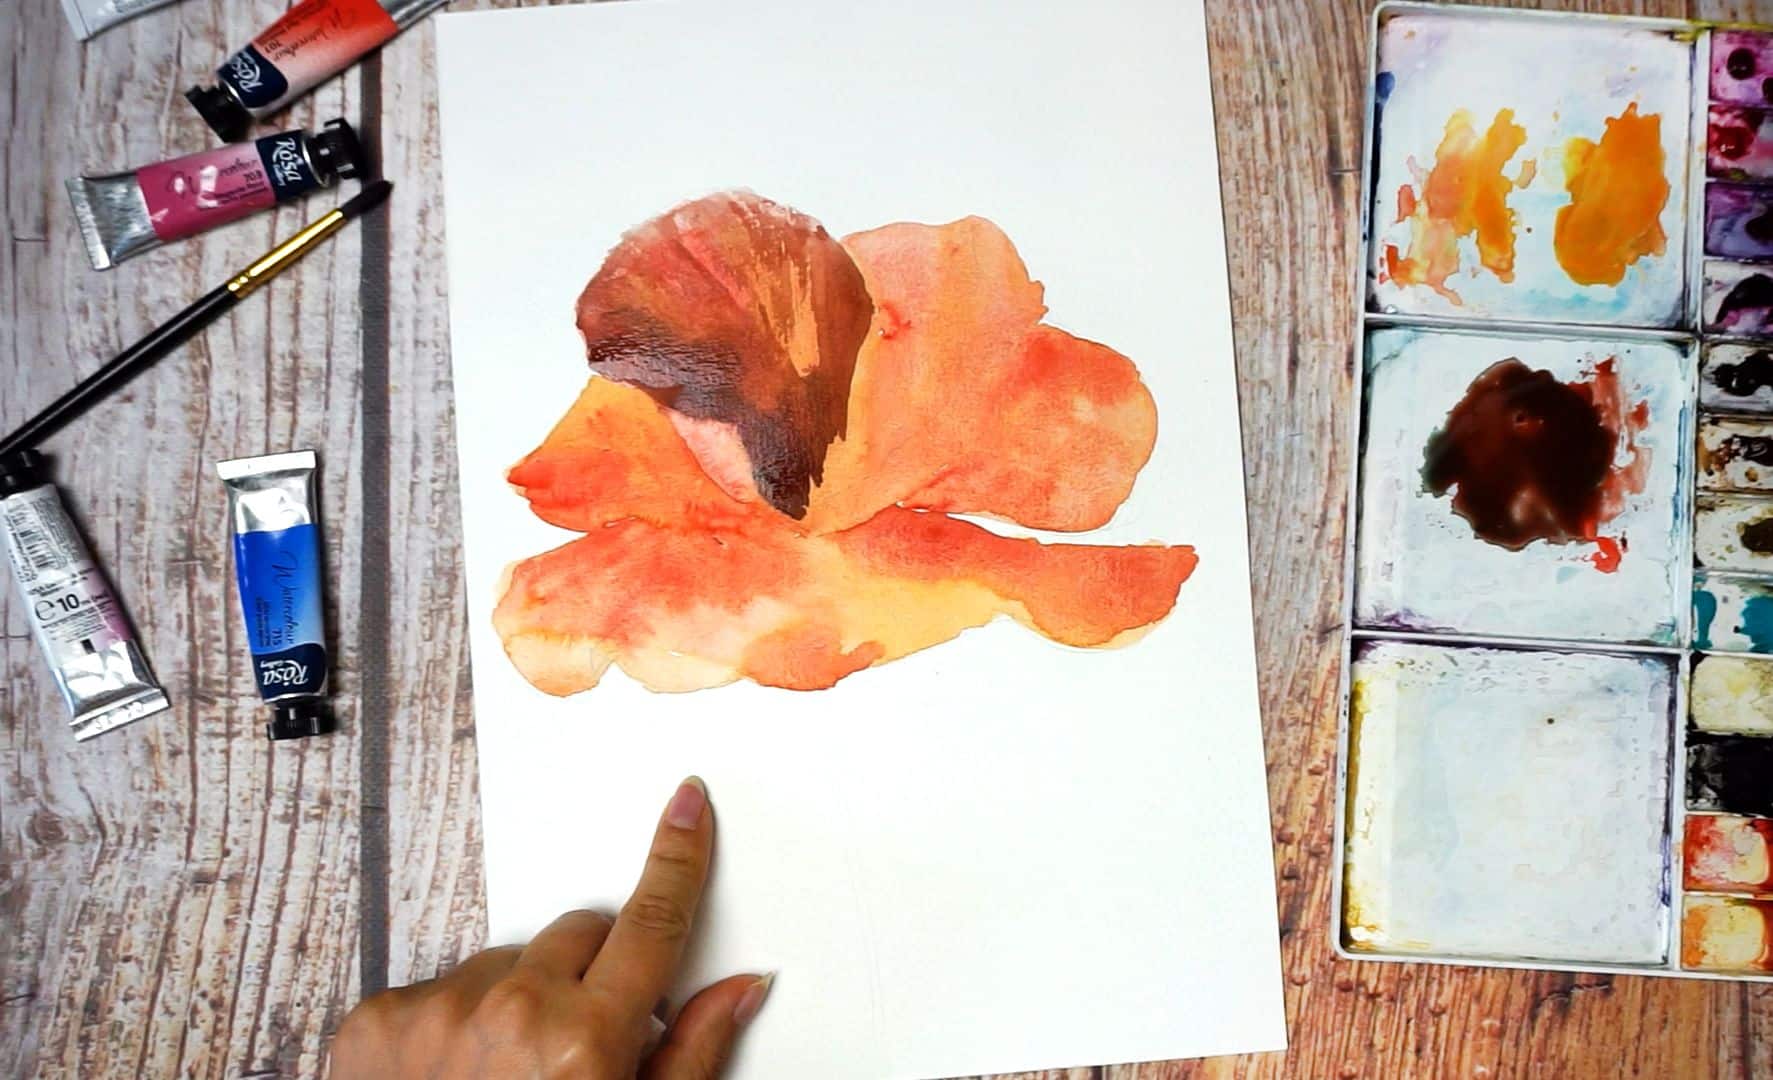
Keep working the darker red tone on this petal. If you have too much water/liquid on your brush you will probably dilute a previous layer of paint. So, make sure your brush is moderately wet. Do not cover the whole petal with a darker tone. This is a shadow, paint it selectively, allow some bright red to shine through. I also extended my shadow-work on the petal nearby.
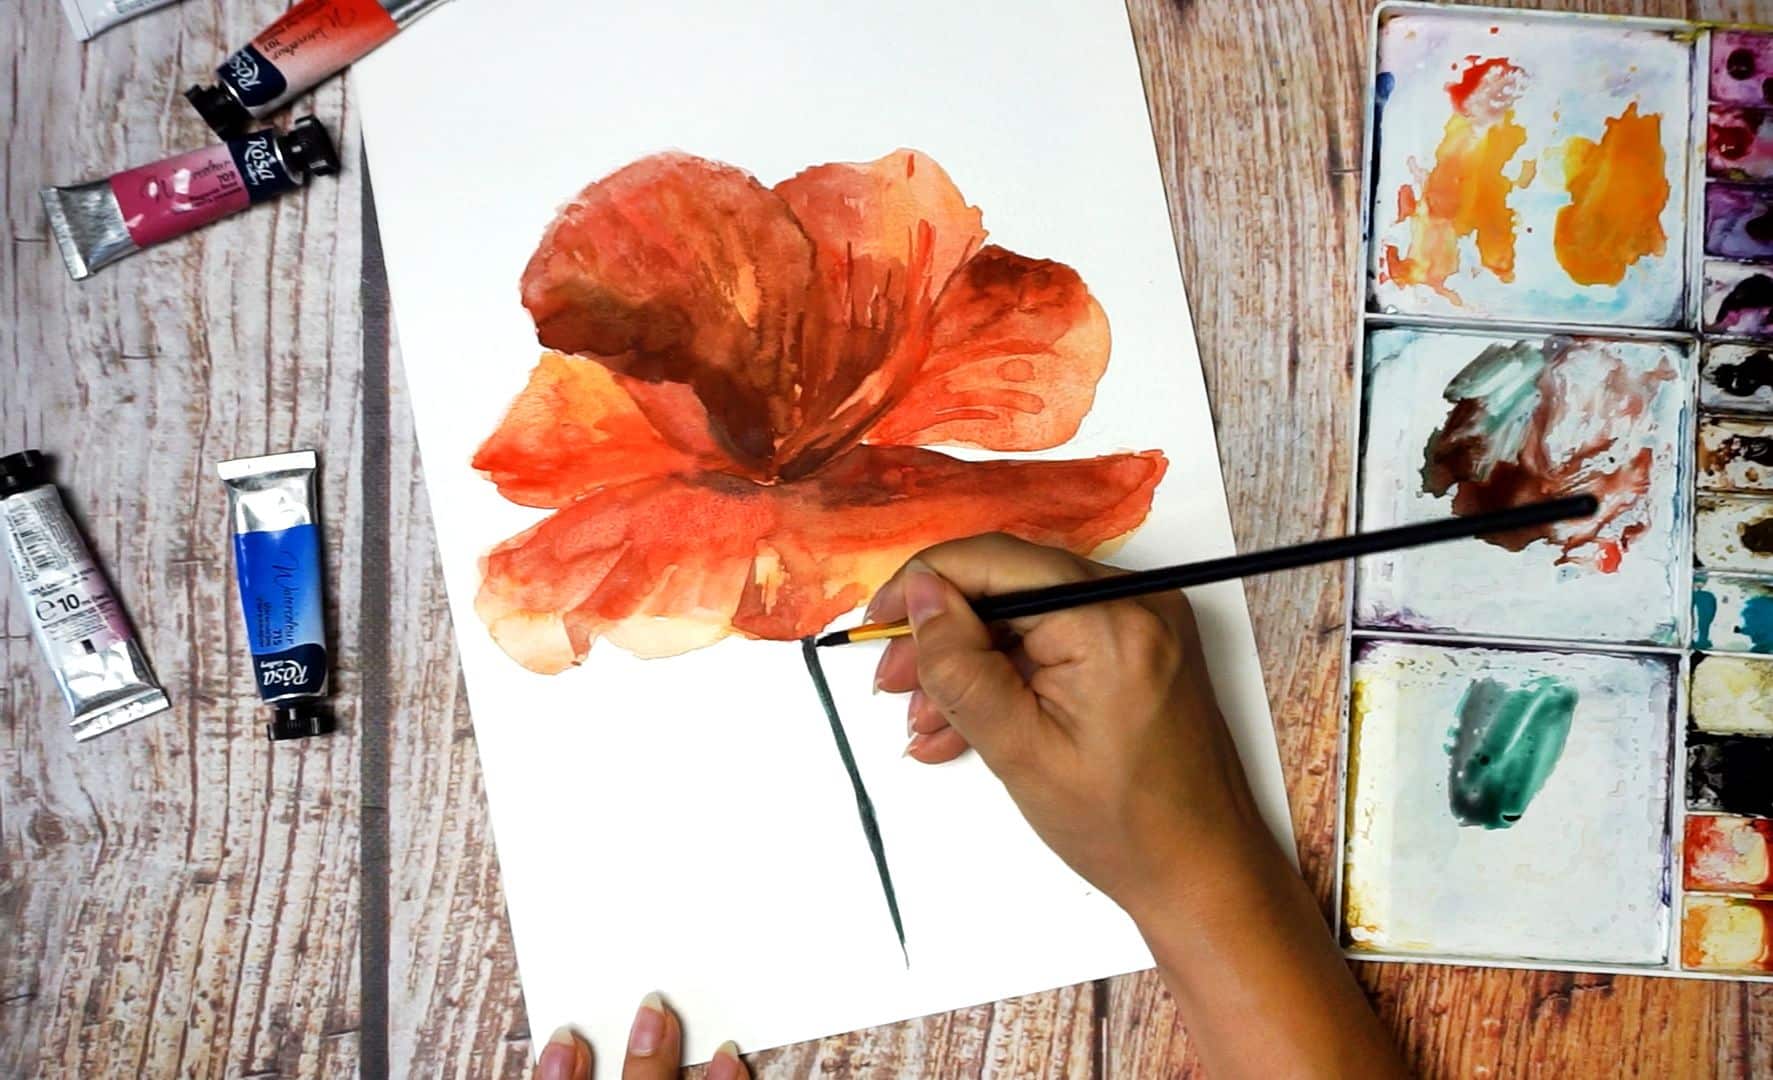
Step 11
Now it’s time to work on the next petal. Here I chose a lighter tone and intensified red color instead. Also marked a few veins. It is important to balance between highlights and shadows on our flower.
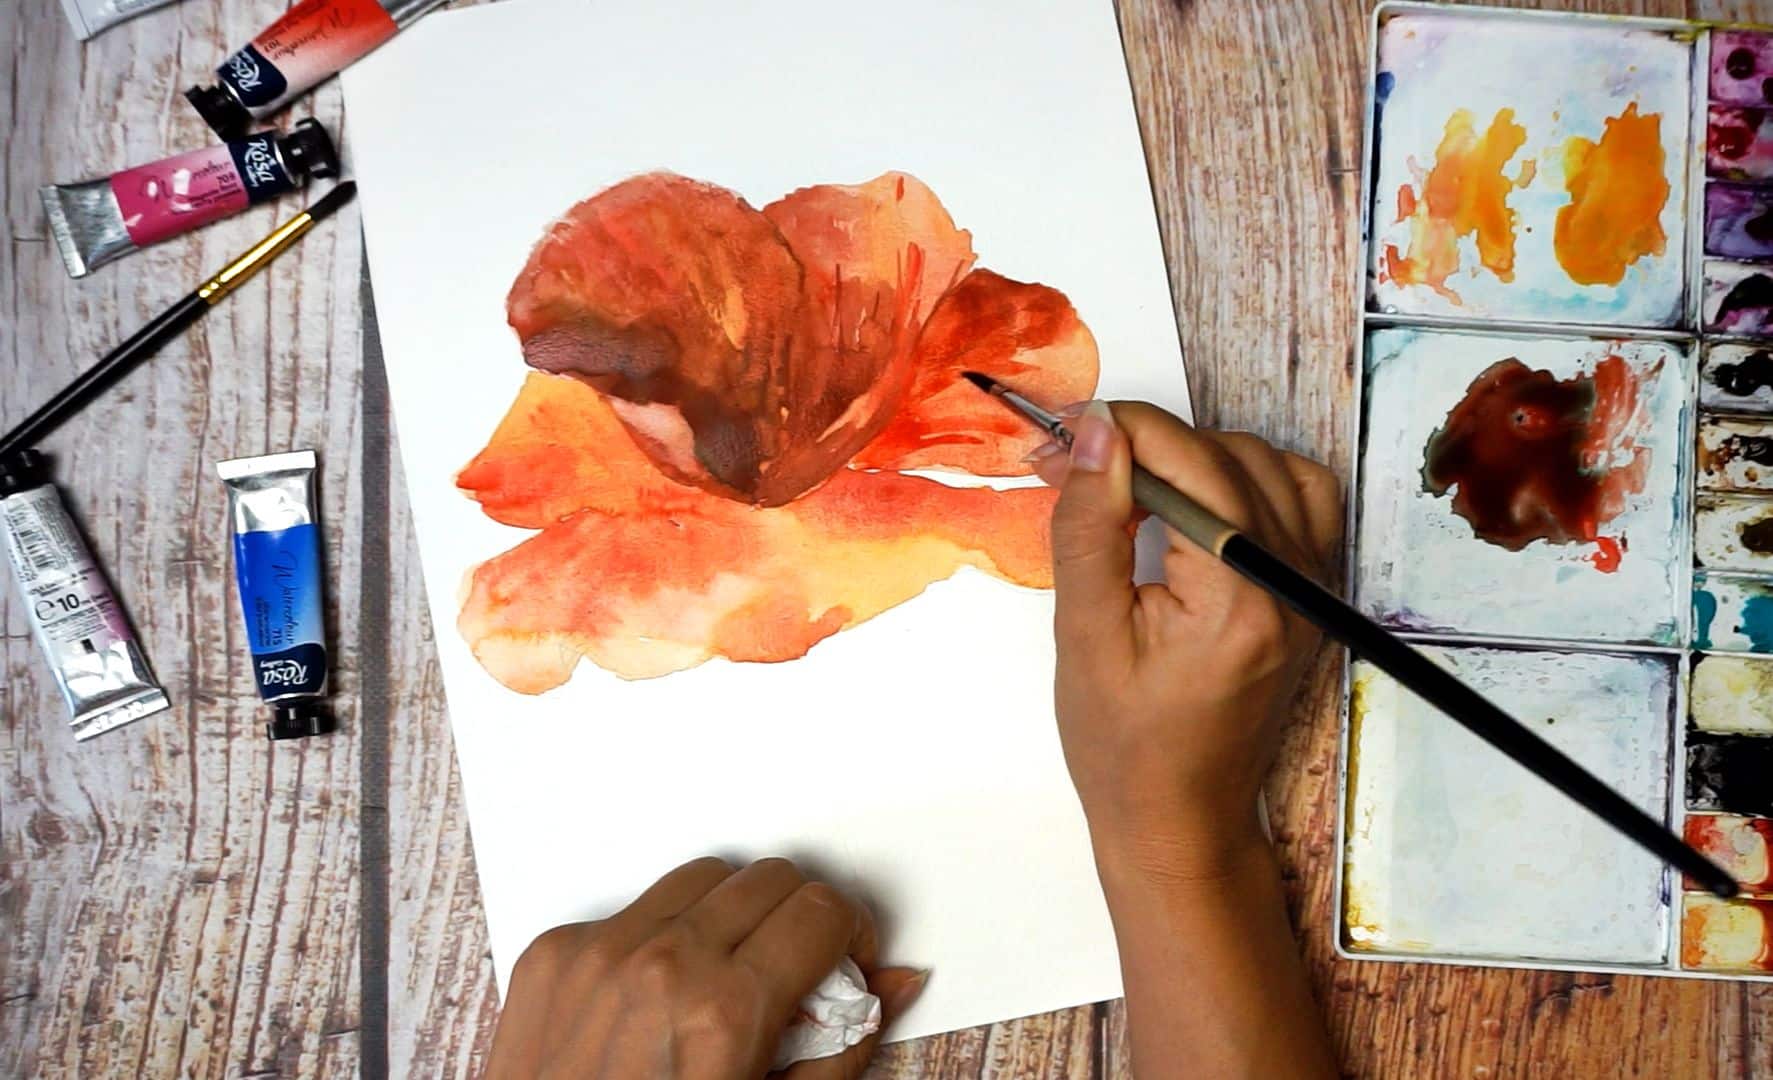
Step 12
Working on the remaining petals. With a darker tone, I marked the area where the petal has folded. Also, the middle part of the flower got the most shadow. The edges of the petals are the brightest.
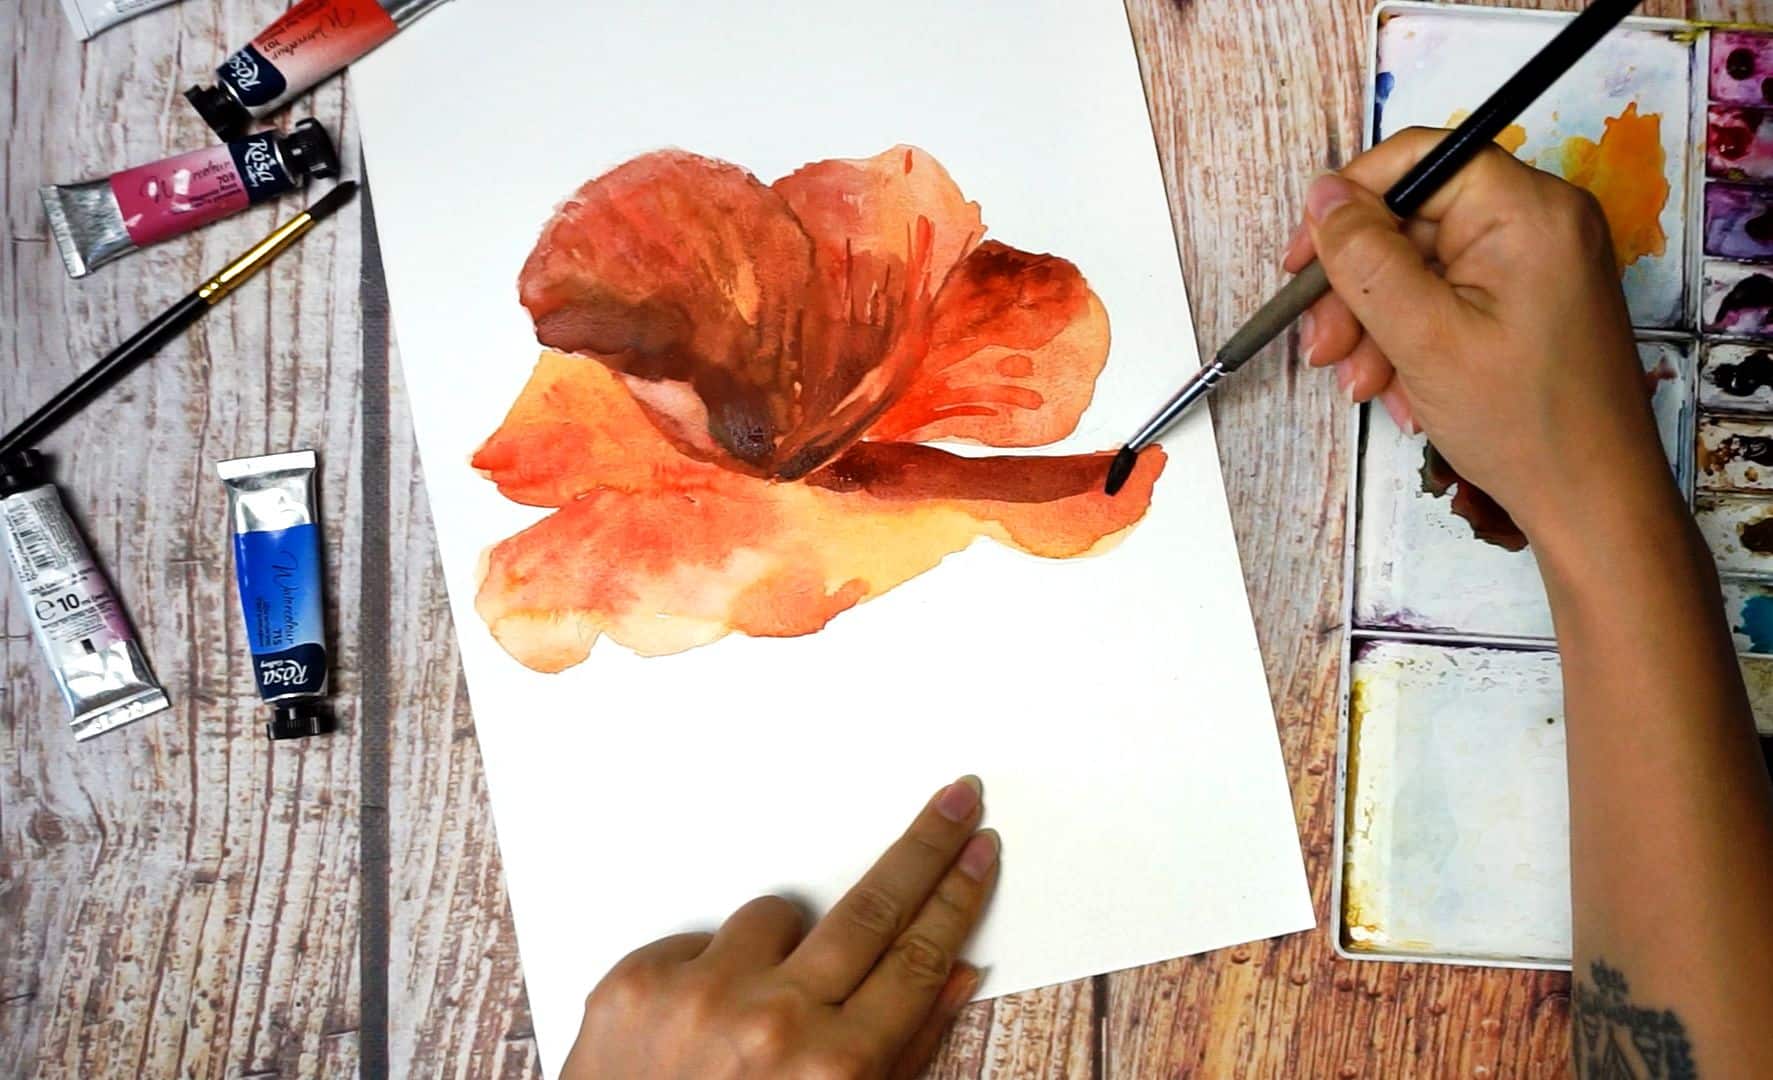
Step 13
I took a moment to paint a stem with light green color (Green, Emerald Green, Phthalo green etc).
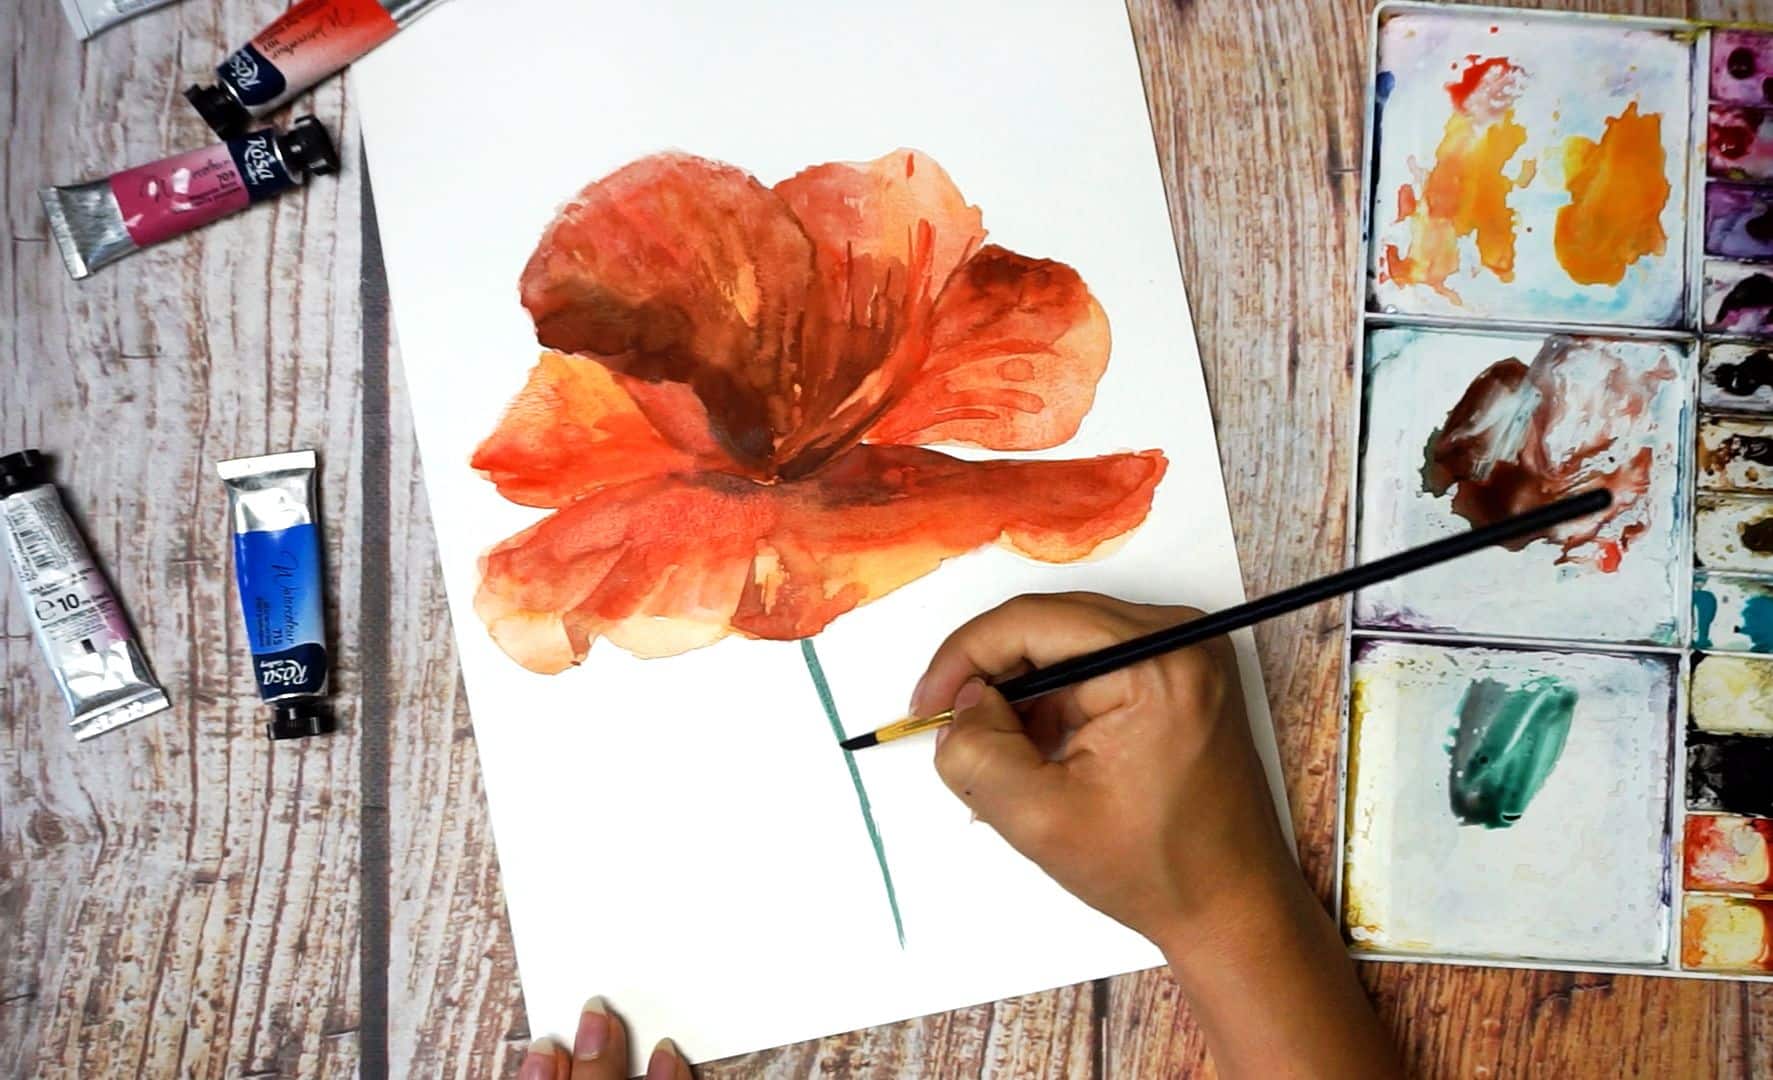
Step 14
Before the stem got dry, I applied a darker tone on it. The darker tone of green is achieved by adding a little red into your green.
Step 15
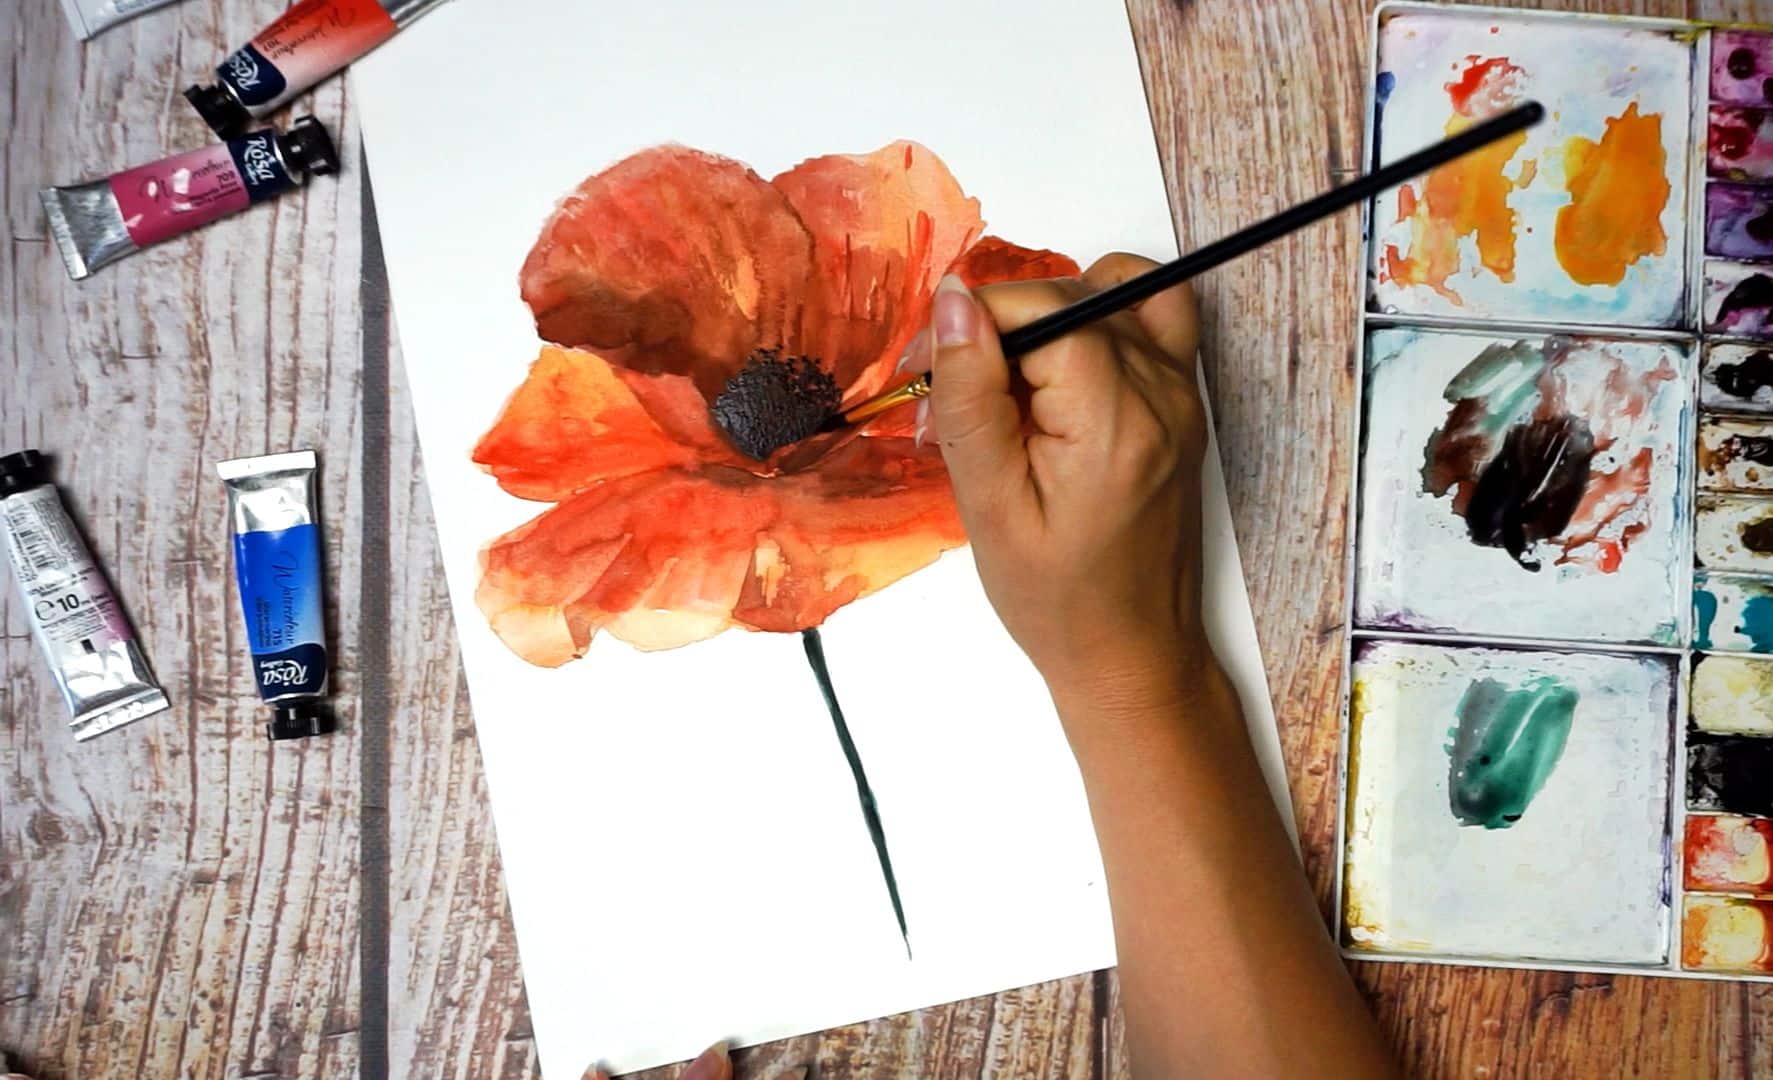
Our watercolor poppy is almost ready! I picked black paint (Neutral black) and painted pistils and stamens with pointy moves, the heart of the flower.
Step 16
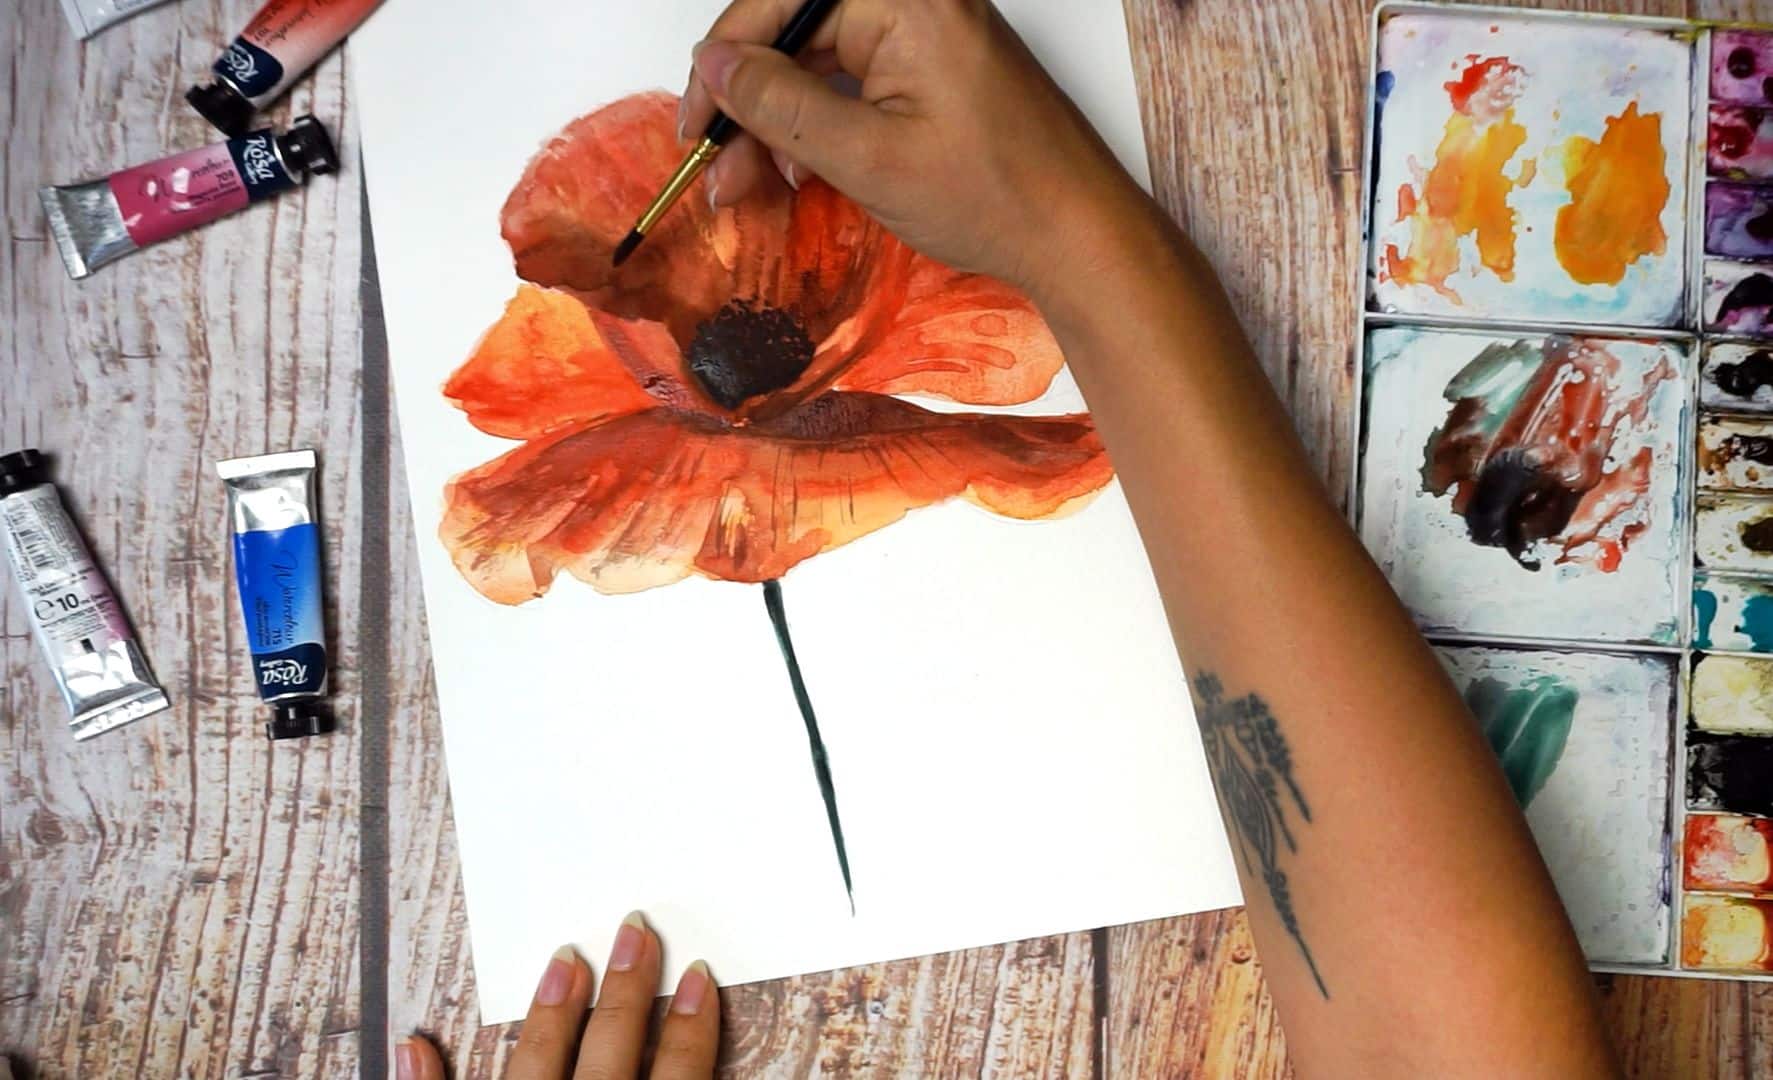
It is an optional step. If you feel like the flower is missing some details like one stokes, thin veins, etc this is a moment to add them! Just remember that it is important to know when to stop. Do not overdo it.
Et voila! We’ve got our realistic colorful poppy flower in watercolor! Botanical art can be fun and simple! Share your paintings with us.
You can watch a demo video of the whole painting process on our YouTube channel:
If you would like to discover more floral paintings and take up challenging botanical artworks, we have online classes at our Watercolors Academy. For example, how about painting mysterious leaves?